
Ahhh…drop backs. They’re both exciting, and terrifying all at the same time. When you’re first given this pose, you get help to go back and come up, (thank God). But at some point (especially if your teacher is David Robson), during your final backbend, you might just hear, “Strong legs… Now fingertips…” shouted from across the room. He may not say your name, but with those dreaded words you know he means you’re coming up on your own.
Obviously, he’ll only shout this out if deep down he knows you can come up by yourself, but still… it’s terrifying.
Dropping back, and back bending can be some of the most challenging of the asanas. If done incorrectly, they can also result in a host of injuries, and can potentially cause a lot of undue pain. Whether you do primary series or are deep into third, there are some fundamental things you should be doing to support your backbends.
While this post offers some helpful tips and suggestions, if you are struggling with drop-backs or backbending, I would highly recommend you check out David’s newest video: Principles of Pain-Free Back Bending. He really breaks down back bending in a way that is simple and easy to understand.
In this post, our very own David Robson himself has come up with some really useful stretches and exercises to support and improve your drop backs!
Flexibility and Strengthening Exercises
Dropbacks require a combination of both strength and flexibility. Here are some simple exercises you can do to improve your dropbacks.
Lunges
Lunges are great for opening up the front line of the body and preparing for backbends. Here are a few variations that might be helpful!
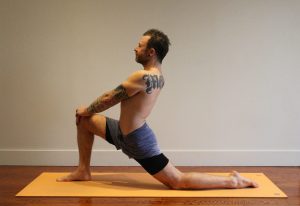
- Come down on one knee, with the shin and foot of the back leg resting on the floor behind you.
- Your front leg is bent at 90°, with the knee over the foot to start.
- Gently bend the front knee and allow the back leg thigh and hip to drop toward the floor.
- Keep your hips level to maintain the stretch in the hip flexor.
- Hold for 30 seconds to 1 minute. Use your breath to soften into the stretch.
- To deepen the stretch in the front of the hip, if your body will allow it, try the splits!

Ustrasana (Camel Pose) Variation
Practicing this backbend opens the front body, and gives you the opportunity to work on strengthening your legs while relaxing your bum. Follow along using the pictures with helpful cues underneath!
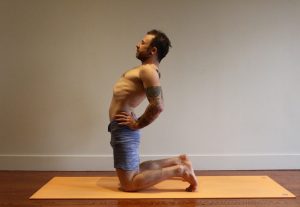
Come onto both knees with your hands on your hips.

Press the tops of your feet and toes into the ground and see if you can get the backs on your legs to engage. Bring the hips slightly forward past the knees.
Gently squeeze your thighs in towards each other. Suck in the lower belly, below the navel. Use your hands to make sure your bum is soft.
Important: If you’re doing this with a friend you should only be checking your own bum.
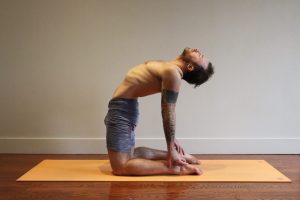
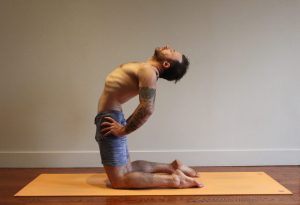
To go a little deeper you can bring your hands to your heels. Try to lift your chest to feel more stretch and openness in the front body.
Shoulder opening – Gomukhasana (Cow Face Pose) variation.
This posture helps to open up the shoulders and prepare them for the external rotation required for dropping back.
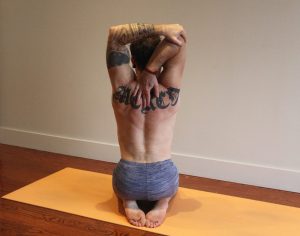
- Bring your right arm up and over your head to place the palm against your middle upper back.
- Bring your left hand to the right elbow and gently press down with the left hand as you reach up with the right elbow.
- Lift your chin and slightly press your head back.
- Do this on both sides.
Variation
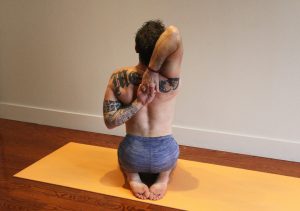
- To make this more challenging, internally rotate the opposite arm, and reach back to grab your hand.
- If you can’t bring your hands completely together, you can try using a strap to slowly bring them closer together.
Putting it Together
Setting Up The Leg Pattern Of Dropping Back
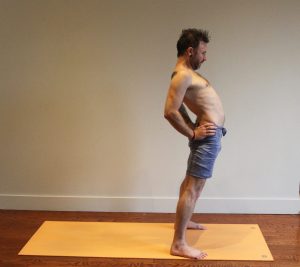
Setting a solid foundation for our dropbacks is really important, and sets the stage for the entire pose. Follow along using the pictures and accompanying cues underneath!
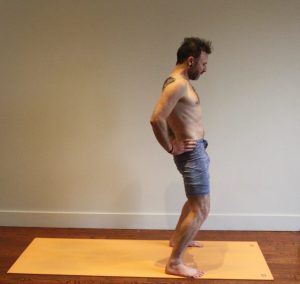
Stand with your feet hip-width apart, with the toes pointing forward. Bend the knees so that when you look down you can’t see your toes you can only see your knees.
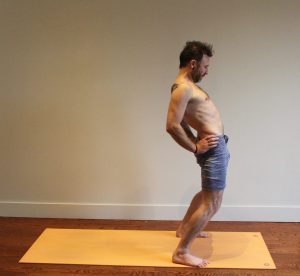
Keeping the bum soft, bring your hips forward over your knees, so when you look down you can just see your belly and hips.
Keep pushing down through the legs as though you’re going to straighten them, but don’t fully straighten them.
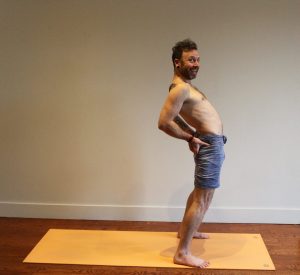
Pressing down through your heels, the back of your legs should be engaged. Use your hands to make sure your bum is soft! Really suck the lower belly in to give your back support.
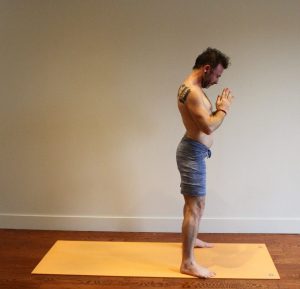
Hanging
If you’re not able to go all the way back, continue to find strength in your legs and slowly play around with going back into the hanging position. Follow along with the pictures and accompanying cues.
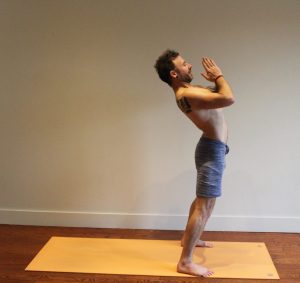
Keep finding the leg pattern and bring your hands into a prayer position. Start to lift the elbows up away from the floor, stretching them up toward the ceiling.
As the arms reach up you want to feel like your back ribs lift away from the hips. Keep finding space in the lower back.
Don’t worry about going back or going deep – just focus on finding the work in this position.
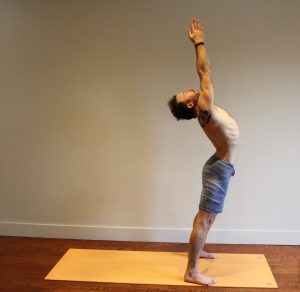
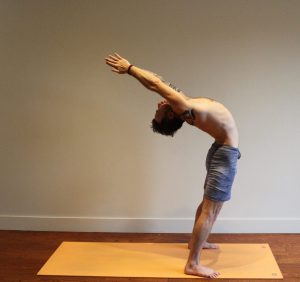
Dropping All The Way Back
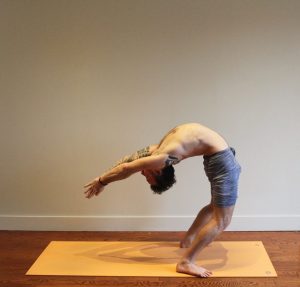
Reaching up and back, go as far back as feels comfortable. It is better to maintain some control over the movement so you don’t risk injuring yourself.
Even if you go back just a couple feet onto the wall, or sofa, or stair that’s fine. Maybe, eventually, you choose to go all the way to the ground.
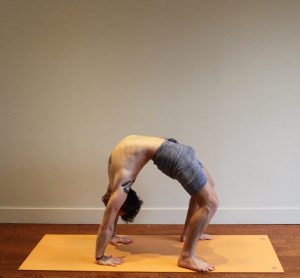
Coming back up
The problem with dropping back is that you need to find a way back up! You don’t need to come back up to standing if you don’t feel totally comfortable. If you’ve never come back up on your own before, I’d recommend doing so under the supervision of a skilled teacher. If you have come up by yourself before, you may find these tips useful! Follow along with the picutes and cues underneath.
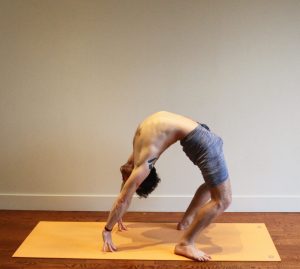
- Start by coming on to your fingertips and finding the work your legs.
- Feel the strength of the legs pressing your hips forward and up.
- If you feel comfortable and strong you can try to gently rock back and forth, pressing off the tips of the fingers to get a bit of airtime.
- With lots of practice, eventually, you will come back up to standing! Voila!
Like I said before, dropping back is hard, and sometimes even scary. Though we all can’t be as graceful as David in our backbends, hopefully, this tutorial will bring us all a little closer. If you found this useful, let us know in the comments below!